8 Steps to Fix the Automotive Rust Like a Pro
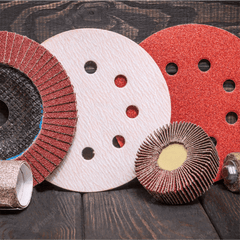
Removing rust is not complicated, but it can be time-consuming as you wait for the primer and paint to dry during the work. You'll need to plan to buy supplies like Fastplus sandpaper and sanding discs for the car, masking tape, primer, poly film, tack rags, touch-up paint, polish compound, and a clear coat. Choose a calm and cloudy day, and schedule a whole day to fix the most common rust spots on your hood and the doors of the car.
Automotive rust is inevitable. However, if you treat rust early, you can stop it from spreading and give your vehicle a few more years of life.
Step 1 Tape the repair area
- Tape the tip of the poly sheet a few feet away from the repair area to allow room to blend the touch-up paint into the appropriate area.
Step 2 Remove rust
- Scrape off air bubbles with a scraper.
- Grind the rusted area down to the bare metal with 40 grit sandpaper.
- Expand the bevel area to make room for smoothing the edges.
- Switch to 120-grit sandpaper and round the edges of the repair area.
- Complete the feathering with 220 grit.
- Use a vacuum cloth to remove particles from unmasked areas.
Step 3 Clean with detergent 
- If the rust punctures the metal, either fill it with putty immediately or wait for the epoxy primer to dry before applying a few coats of putty primer.
- Wash the entire mask off area with degreasing dish detergent followed by clean soapy water.
- Allow drying.
- Wipe the area with a lint-free cloth to remove any remaining dust or lint.
- Use the paint manufacturer's spare solvent.
Step 4 Apply epoxy primer, then apply filler primer
- Spray the filler primer and apply a thick layer to cover the entire repair area.
- Hold the can slightly off the surface and let it blend into the surrounding paint.
Pro tip:
- A self-etching epoxy primer adheres strongly to the bare metal and should be used as the first coat.
- Allow the recommended waiting time on the label (usually 15 minutes) and spray 2-3 coats of the middle coat.
- Wait an hour for the epoxy to dry completely (or longer if it's damp outside).
Step 5 Sand the primer
- Start with a damp 600-grit sandpaper to smooth over the primer and smooth out the edges.
- Switch to 1000-grit wet sandpaper to finish sanding the entire repair,
including the mixed areas.

- Rinse with clean water and let dry.
- Wipe off the dried epoxy primer with a lint-free cloth.
- Apply 2-3 thick coats of paint filler primer, allowing time to dry between each coat.
- Wait at least one hour until the paint primer is dry to the touch before sanding.
- Use 320-grit sandpaper to remove water droplets and slack.
- Then sand the entire repair area last.
Step 6 Apply a colored primer 
- Holding the spray can about 12 inches from the surface, spray the repaired area.
- Starting at the bottom of the repair, apply coats of color in left-to-right rows, overlapping by about a third each time.
- Slowly apply the color to the repaired area and surrounding area in two to three coats.
- Leave about 10 to 15 minutes between coats.
- Let the primer dry for at least 60 minutes until it feels dry to the touch.
Step 7 Spray on the clear coat
- Apply several coats of clear coat and allow recommended drying time between coats.
- Gradually apply the clear coat to the surrounding painted area for smooth blended lines.
Note: This is the hardest part, as all clear coats are easy to apply, which can ruin the look of the paint. If you're sanding over clear coat, you have to let it dry for at least 48 hours before attempting to restore it with fine grit sandpaper and polish. Then you have to re-spray the sanded area. So practice spraying on a piece of scrap cardboard to get a feel for the nozzle and spray speed.
- Let the clear coat dry for several hours before driving the vehicle and at least 48 hours before polishing.
Step 8 Buff the repair
- Use an old cotton t-shirt or microfiber cloth and an abrasive to manually buff the repaired area.
Final Thoughts
Removing rust from the metal of your car or other project vehicle is not a black and white or cut and dry process. Depending on the degree of rust, the condition of the metal, and even the likelihood of rust recurring. you have several options to get the job done.
The most important thing to remember is to dedicate time to this type of project. And when in doubt, throw it away. Parts such as frames, chassis components, and other critical safety parts should always be replaced rather than repaired.
Buy Fastplus Factory-Direct Abrasives
Want to purchase high-quality, factory-direct sanding discs, sanding sheet rolls, and film abrasive discs for automotive applications? Try Fastplus Abrasives today and place your orders online! 


