
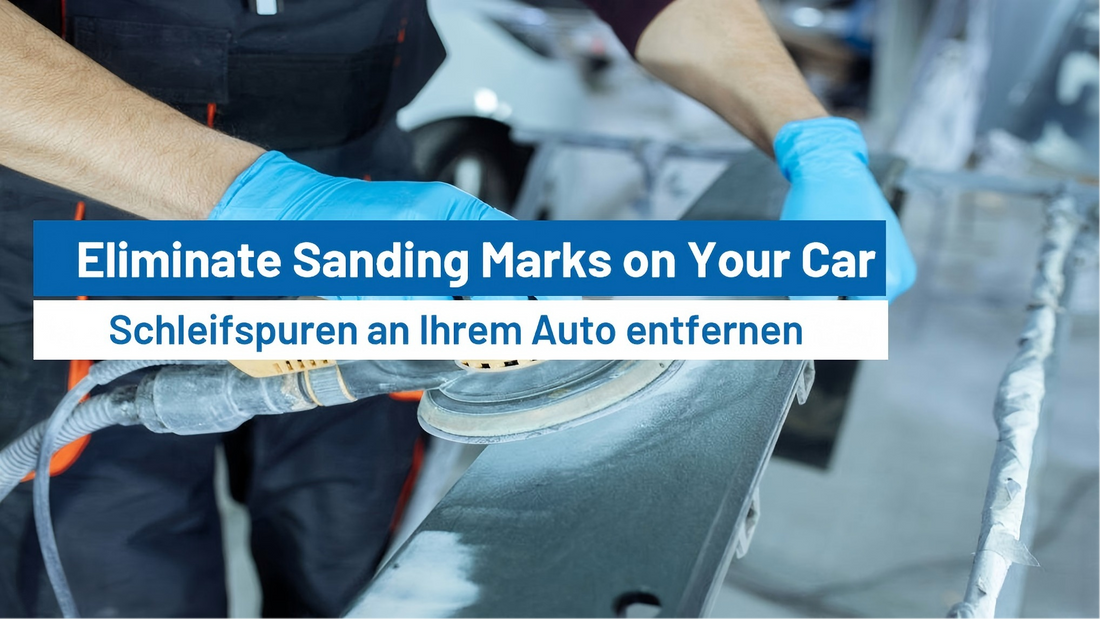
How to Get Rid of Sanding Marks on Your Car?
If you're a car enthusiast, DIYer, or just someone looking to restore the beauty of your vehicle, sanding is often a necessary step. Whether you're prepping your car for a fresh coat of paint, smoothing out imperfections, or buffing down previous layers, sanding is essential. However, the process can leave behind unsightly sanding marks that can affect the overall appearance of your car’s finish. But don't worry—getting rid of sanding marks is possible, and with the right techniques and tools, you can achieve a flawless, glossy surface.
In this blog post, we’ll walk you through expert tips to eliminate sanding marks from your car and help you restore its shine to showroom-quality.

Why Do Sanding Marks Appear?
Before we dive into how to fix sanding marks, it’s important to understand why they appear in the first place. Sanding marks are essentially visible grooves or lines left on the surface after the sanding process. Several factors can contribute to sanding marks:
- Incorrect Grit Selection: Using too coarse of a sanding paper for a finer finish can leave deeper grooves that are harder to remove.
- Improper Sanding Technique: Sanding in one direction or uneven pressure can lead to visible marks.
- Not Sanding Enough: Skipping finer grits or not sanding long enough can cause obvious sanding marks.
- Sanding Over Existing Imperfections: If you haven't removed previous paint or clear coat properly, the marks might be more visible after sanding.
Understanding these causes will help you avoid them in the future, but let's focus on how to fix those sanding marks effectively.
Step-by-Step Guide to Removing Sanding Marks
1. Ensure You Have the Right Tools and Materials
To effectively remove sanding marks, you need to have the right tools. Here’s a list of essential materials:
- Sanding Paper (Wet and Dry): Start with a finer grit sandpaper and progress to finer grits.
- Polishing Compound: To polish the surface after sanding.
- Buffing Pads or Polishing Foam Discs: For buffing out sanding marks and restoring the glossy finish. The 150mm Flexpro Fine Finishing Foam Discs FF19 Grip are ideal for this task.
- Water and Sponge: To wet-sand (if you choose this method).
- Microfiber Towels: For cleaning and wiping down the surface.
- Polisher or Orbital Buffer: To achieve that perfect, smooth finish.
- Net Sanding Disc CeraMesh 150mm: This tool is great for fine sanding, providing a dust-free experience and excellent sanding results.
2. Wet Sanding: The Key to Eliminating Sanding Marks
One of the most effective ways to get rid of sanding marks is through wet sanding. Wet sanding helps to reduce the risk of further scratches and keeps the sanding surface cool, preventing the paint from being damaged. Here’s how to do it:
Step 1: Clean the Car
Before you start sanding, make sure your car’s surface is clean. Wash the car thoroughly to remove any dirt or debris that can cause additional scratches while sanding.
 Step 2: Choose the Right Grit Sandpaper
Start with a Wet and Dry Sandpaper like BN38 SiC 230x280mm or finer. If you're working with deeper marks, you may need to use something like a 1500-grit first. Always choose wet-sanding paper for this task.
Step 3: Wet the Sandpaper and Surface
Use a sponge to apply water to the surface of the car, and wet the sandpaper as well. This will help prevent any particles from scratching the surface and will give you a smoother finish.
Step 4: Sand in a Circular Motion
Sand gently in a circular or back-and-forth motion, maintaining light pressure. Avoid staying in one spot for too long to prevent creating new marks.
Step 5: Rinse and Check
Frequently rinse the surface with clean water to check your progress. It’s important to keep the surface wet, so the sanding paper can glide smoothly.
Step 6: Use the Net Sanding Disc CeraMesh 150mm
Once you’ve completed the initial sanding with Wet and Dry Sandpaper, switch to the Net Sanding Disc CeraMesh 150mm for the next finer level. The CeraMesh sanding disc is perfect for dust-free sanding and provides a high-quality finish. It allows you to avoid clogging and helps maintain consistent sanding throughout the process. Continue sanding in circular motions, checking your progress often.
Step 7: Repeat if Necessary
If marks remain, move on to a finer grit sandpaper (2500-3000 grit). Always work progressively with finer grits for the best finish.
3. Buffing: Bring Back the Shine
Once you’ve finished sanding, the next step is to buff the surface to remove any leftover fine marks and restore the car’s gloss. Here’s how:
Step 1: Apply Polishing Compound
Using a polishing compound or rubbing compound, apply a thin layer to the area you sanded. Be sure to use a high-quality compound to achieve a professional look.
Step 2: Use a Polisher or Orbital Buffer
Attach a buffing pad or foam disc like the 150mm Flexpro Fine Finishing Foam Discs FF19 Grip to your polisher and set it to a low speed. Slowly buff the compound into the surface using overlapping circular motions. Be sure not to apply too much pressure—let the machine do the work Step 3: Wipe Away Excess Compound
After buffing, wipe away any excess polishing compound with a clean microfiber towel. You should now see a significant reduction in sanding marks, with a smoother and shinier surface.
Step 4: Repeat if Necessary
If marks are still visible, repeat the buffing process with a finer polishing compound until the desired finish is achieved.
4. Hand Polishing: For a More Precise Finish
If you don’t have a polisher, don’t worry! Hand polishing can also be effective, especially for smaller areas or for getting into tight spots. Here's how:
Step 1: Apply Polishing Compound
Put a small amount of polishing compound onto a clean microfiber towel or polishing pad.
Step 2: Polish by Hand
Using circular motions, rub the polishing compound into the surface. Apply consistent pressure but avoid pushing too hard.
Step 3: Wipe Away Excess Compound
After polishing, wipe off the excess compound and check the surface. You should notice the sanding marks fading away, leaving behind a smooth, glossy finish.
5. Final Inspection and Touch-Up
Once you’ve polished the area, do a final inspection to ensure no sanding marks remain. Look at the car under different lighting conditions to catch any marks that might still be visible. If necessary, perform some touch-up work on smaller areas using finer sandpaper or additional polishing.
6. Protect the Finish
After removing the sanding marks and achieving that glossy finish, it’s crucial to protect the paint. Applying a ceramic coating or wax will help maintain the shine and provide a layer of protection against future scratches, contaminants, and UV damage. This step is essential to preserve the results of your hard work.
Additional Tips for Preventing Sanding Marks in the Future

While eliminating sanding marks is essential, preventing them in the first place can save you time and effort in the future. Here are some additional tips:
- Choose the Right Grit Sandpaper: Always start with the right grit sandpaper. Using a coarse grit paper on a fine surface can leave deep marks that are hard to remove.
- Sand Evenly: Don’t apply too much pressure during sanding, as this can cause uneven results.
- Use a Guide or Block: To ensure even sanding pressure, use a sanding block or guide to help distribute the pressure evenly.
- Avoid Over-sanding: You don’t need to overdo it—only sand as much as necessary to remove imperfections.
- Use Dust-Free Sanding Discs: For a cleaner sanding process and to avoid clogging, consider using Net Sanding Disc CeraMesh 150mm, which is designed to minimize dust buildup and maintain a consistent finish throughout your sanding tasks.
Conclusion
Sanding marks can be frustrating, but with the right techniques and tools, you can easily eliminate them and restore your car’s finish to its original beauty. Whether you choose to wet-sand, hand polish, or buff, the key to success is patience and attention to detail. By following the steps outlined in this guide, you'll be well on your way to a flawless, glossy car surface that shines like new.
If you're in need of sanding products, from sandpaper rolls to foam finishing discs, we’ve got everything you need for a perfect car finish. Browse our online store today for high-quality sanding supplies that’ll help you get the job done right.


