
How to Polish Epoxy After Sanding?
Epoxy resin is a popular material for creating countertops, tabletops, jewelry, river tables, flooring, and even decorative art. Its glossy, glass-like finish is one of the main reasons people choose epoxy. However, achieving that mirror-like shine requires more than just pouring and curing the resin—it often involves sanding and polishing.
If you’ve ever worked with epoxy, you’ll know that after sanding, the surface can look dull, hazy, and far from the flawless finish you imagined. That’s completely normal. Sanding removes imperfections like bubbles, drips, and uneven areas, but it leaves behind tiny scratches that scatter light. The secret to restoring the clarity and depth of epoxy is polishing.
This step-by-step guide will walk you through everything you need to know about how to polish epoxy after sanding. From the tools and materials you’ll need, to proper technique, to tips for long-lasting shine, you’ll have the knowledge to turn your sanded epoxy project into a stunning, professional-looking finish.
Why Polishing is Important After Sanding Epoxy

When you sand epoxy, you are essentially leveling the surface. Whether you’re removing high spots, sanding out dust nibs, or correcting uneven curing, sanding ensures the surface is smooth. But sandpaper—no matter how fine—leaves behind micro-scratches.
- These scratches scatter light instead of letting it pass directly through the epoxy. That’s why the resin looks cloudy or matte after sanding. Polishing removes or blends those scratches until the surface becomes optically clear and reflective. Done properly, polishing restores the deep, wet-glass look that makes epoxy so visually striking.
Tools and Materials You’ll Need
Before you begin polishing, gather the right tools and products. Using proper equipment makes the process faster, easier, and more effective.
-
 Sanding supplies:
- Wet/dry sandpaper in fine grits (starting around 800 grit, moving up to 3000 or higher)
- Sanding block or orbital sander with hook-and-loop pads
-
Polishing supplies:
- Polishing compound (designed for plastics or automotive clear coat)
- Finishing polish (for extra shine)
- Polishing pads (foam or microfiber)
- Variable-speed polisher or drill with polishing attachment
-
Cleaning materials:
- Spray bottle with clean water (for wet sanding)
- Microfiber cloths
- Mild soap or isopropyl alcohol
-
Optional protective finish:
- Carnauba wax or specialized epoxy topcoat sealant
Step 1: Prepare the Surface
Before polishing, ensure your epoxy surface is clean and free of debris. Any dust, oils, or contaminants can scratch the surface during sanding and polishing.
- Wash the epoxy surface with warm soapy water and a soft cloth.
- Rinse thoroughly and dry with a clean towel.
- Inspect for imperfections—this is when you’ll identify drips, bubbles, or unevenness that sanding has smoothed out.

Step 2: Sand the Epoxy Smooth
Polishing alone cannot fix an uneven surface. You must sand the epoxy flat before polishing. If you’ve already sanded, you may only need a light finishing pass with higher grit sandpaper.
Wet Sanding
Wet sanding is preferred because it reduces dust and helps prevent clogging of the sandpaper. It also produces a smoother surface.
- Fill a spray bottle with clean water.
- Spray the epoxy surface and the sandpaper to keep everything lubricated.
- Using 800-grit wet/dry sandpaper, sand the surface in circular motions or in consistent back-and-forth strokes.
- Rinse frequently to remove sanding slurry.
- Move progressively through finer grits: 1000, 1500, 2000, and up to 3000 or even 5000 grit for best results.
Tip: Never skip grits. Each finer grit removes the scratches left by the previous grit. Skipping can leave visible marks that polishing won’t remove.
By the end of sanding, the epoxy should look uniformly hazy but feel very smooth to the touch.
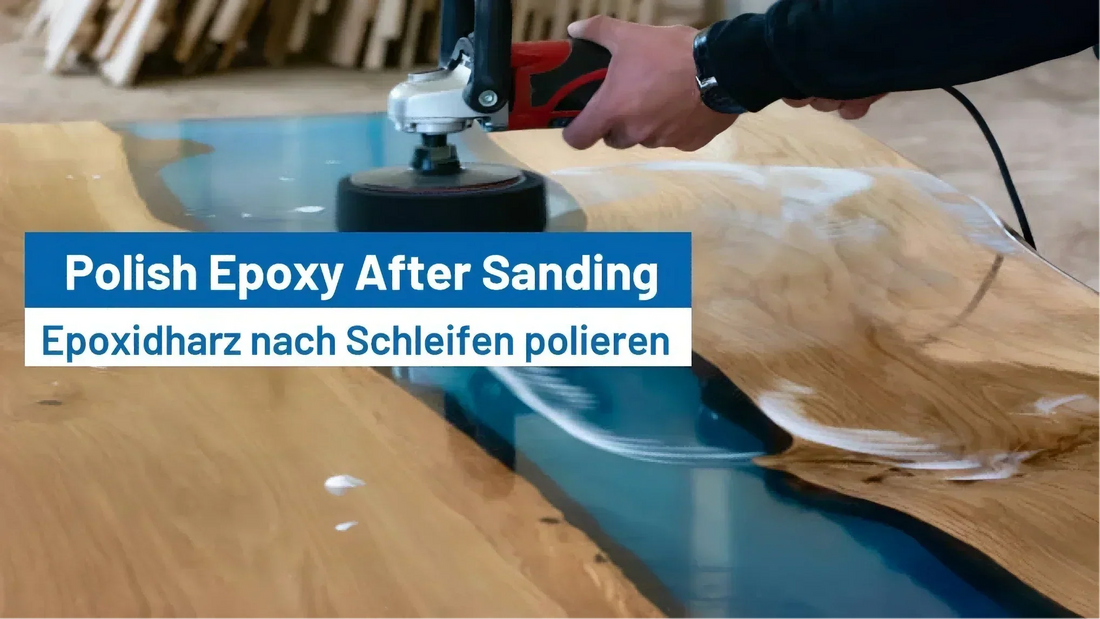
Step 3: Apply Polishing Compound
Now that your epoxy is sanded smooth, you’re ready to polish. This is where the surface transforms from dull to glossy.
- Attach a foam polishing pad to your polisher or drill.
- Apply a small amount of polishing compound directly onto the pad or epoxy surface.
- Set the polisher to a low or medium speed.
- Work the compound into the epoxy using overlapping passes. Keep the pad flat to avoid creating swirls.
- Apply light, steady pressure—don’t push too hard. Let the compound and pad do the work.
- Wipe off residue with a microfiber cloth and inspect the shine.
Repeat the process if necessary until the haze is gone and clarity begins to appear.

Step 4: Finish with a Fine Polish
Polishing compounds remove scratches but may not provide the maximum shine. To achieve a mirror-like finish, use a finishing polish.
- Switch to a clean, softer foam or microfiber pad.
- Apply a small amount of finishing polish.
- Buff the epoxy surface using the same overlapping motion at medium-low speed.
- Continue until the epoxy surface reflects light clearly.
By this stage, your epoxy should have a deep, glossy shine comparable to polished glass.
Step 5: Clean and Protect the Finish
Once you’ve achieved the desired polish, clean away all residue. Any leftover compound or polish can dull the finish over time.
- Wipe the epoxy with a clean microfiber cloth dampened with water or isopropyl alcohol.
- Dry thoroughly.
To protect your polished epoxy:
- Apply a thin coat of high-quality carnauba wax or epoxy-safe wax.
- Buff it to a shine.
- This adds a protective layer against fingerprints, scratches, and UV exposure.
Tips for Best Results
- Work in sections: If you’re polishing a large surface like a countertop or table, divide it into sections for more control.
- Keep pads clean: Polishing pads can clog with compound and resin residue. Wash or replace them regularly.
- Use proper lighting: Good lighting helps you spot scratches or swirl marks you may have missed.
- Don’t rush sanding: Proper sanding is the foundation of a clear polish. The more time you invest in sanding, the easier polishing will be.
- Mind the heat: Epoxy can soften if overheated. Avoid running the polisher at high speeds for too long in one spot.
Common Mistakes to Avoid
- Skipping grit levels: Jumping from 800 to 2000 grit may seem like a shortcut, but it leaves deep scratches that polishing cannot fix.
- Polishing before leveling: If your epoxy has uneven areas, polish won’t hide them. Sand thoroughly first.
- Using the wrong compound: Not all polishes work on epoxy. Automotive or plastic-specific polishes yield the best results.
- Applying too much pressure: Pushing down too hard can create swirl marks or burn the epoxy surface.
- Not sealing afterward: Without protection, polished epoxy can quickly accumulate micro-scratches and lose its shine.
Frequently Asked Questions
1. Can I polish epoxy without sanding?
No. If the epoxy has imperfections or has cured unevenly, sanding is essential. Polishing alone cannot remove bubbles, drips, or surface texture.
2. What grit sandpaper should I stop at before polishing?
At least 2000 grit, ideally 3000–5000. The higher the grit, the clearer the polish will look.
3. Can I polish epoxy by hand?
Yes, but it requires significantly more effort. Use microfiber cloths and work in small sections with consistent pressure. A power polisher is recommended for larger projects.
4. How long should I wait before sanding and polishing epoxy?
Allow epoxy to fully cure—typically 7 days, depending on brand and conditions—before sanding and polishing.
5. Will polishing remove scratches and cloudiness completely?
Yes, if you sand properly through the grits and use the right polish. Deep gouges, however, may need repair with additional epoxy.
Conclusion
Polishing epoxy after sanding is the final step that transforms a rough, cloudy surface into a stunning, glass-like finish. With the right tools, proper sanding progression, and careful polishing, you can achieve professional results at home.
The key is patience: don’t rush through sanding, and take your time with polishing passes. Once you see your epoxy shine like crystal, you’ll know the effort was worth it. Whether you’re working on countertops, furniture, or art pieces, mastering the sanding and polishing process will give your epoxy projects the flawless finish they deserve.


