
How to Prepare a Car for Paint?
Whether you're dealing with a few scratches or considering painting a brand-new car, there are some important steps to follow before you start painting a car. First, build up heavily damaged spots with body filler and sand them to a smooth finish. Then, scrub the entire painted surface with sandpapers for car to remove the old paint and prepare it for a new coat. After you've stripped your car off, spray 2-3 coats of the right car primer, which will help your new paint stick and show its full beauty.
Repairing Damaged Spots
Step 1: Pull out large dents with the dent repair kit.

If the car you are painting is heavily dented, the first thing to do is to remove as much of the dent as possible to smooth the surface of the paint. Glue an appropriately sized suction cup to the center of the dent with a hot glue gun and wait 1-2 minutes for the glue to harden. Then pull firmly but gently on the retractable lug until the spring metal returns to its original shape.
- You can buy dent repair kits at any auto supply store for just a few dollars.
- In some areas, such as the hood, trunk and rear panels, a hammer and dolly can be used to remove dents from inside the bodywork.
Step 2: Fill in dents, bumps, and depressions with body fillers.
 Blend your filler into a creamy paste on a mixing board or scrap cardboard. Then, spread it over any uneven areas on the bodywork with a spreader or clean polishing pad. This will help fill in those areas, resulting in a smooth, even painted surface.
For minor imperfections such as pinholes, try glass glue. Enamel fillers are thinner than regular fillers, allowing them to get into places where thicker products cannot.
Step 3: Wait for your filler to harden.

This usually takes between 10-30 minutes, depending on the product you're working with and how much you've applied. In the meantime, avoid handling putty. Otherwise, you may accidentally contaminate the area you just repaired.
- Body fillers are not technically "dry"; they harden due to a chemical reaction. For this reason, a heat lamp or hair dryer can be helpful to speed things up.
- Some body fillers act as primers, which means you can paint them directly as soon as they harden. Be sure to read the specifications of the product you are using, it can save you a lot of time.
Step 4: Sand the edges around the hardened putty to smooth.

Once your putty has had time to fully harden, use a sheet of 150-180 grit sandpaper to sand over it. Be sure to sand in all directions, using vertical, edge, and circular strokes to create an even surface finish.
- When sanding your filler, it is especially important to feather the edges to minimize the possibility of lines or ridges in the finish.
- Block sanders can smooth large areas more easily and comfortably.
Stripping Existing Finish
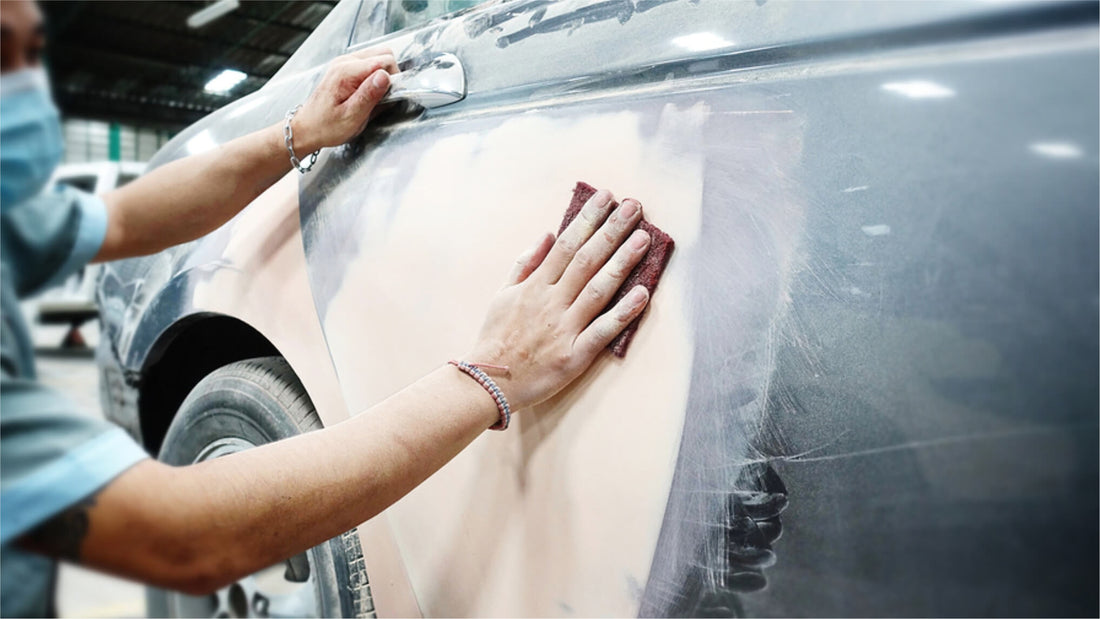
Step 5: Go over your car with a sanding block in preparation for minor repairs.

If you only have a few spots to renew your car's paint, you can use a fine abrasive disc or sanding block to prepare. Slide your sanding disc or sanding block into small circles over each part you want to paint to scratch the outer surface. This will give it just enough texture to accept a fresh coat of paint.
- Make sure the block or sanding disc you are using is no larger than about 1200 grit.
- If it is smaller, it may not rough up the existing paint properly.
Step 6: Use an electric orbital sander to remove paint from large areas.

Equip your orbital sander with a piece of 500-1200 grit sandpaper or a sanding pad. High-speed sanders will allow you to work as quickly and efficiently as possible. It is almost impossible to sand the base metal by hand, so an electric sander is necessary.
- If you don't have an orbital sander, you can rent one from your local hardware store or home improvement center for a small daily price.
- Even with an electric polisher, it can take hours to remove all the paint you need. This is one of the longest steps in preparing a car for painting, so be patient and don't rush it.
Warning: Things can get pretty dusty as you sand. Equip yourself with a pair of goggles and a respirator or dust mask to avoid inhaling harmful particles.
Step 7: Run your sander in a circular motion over each area you will be painting.

Apply the right amount of pressure to ensure that you remove the same amount of paint from every part of the vehicle's exterior. You should see the current paint fade a little after each pass. Work on an entire painted surface in 0.30 to 0.61 m (1 to 2 foot) sections.
- If you are going to paint your car a different color, you will need to sand the bare metal with sanding paper for metal to keep the old color from coming out.
Step 8: Continue sanding until no visible gloss or seams.

After sanding a certain area, turn off your sander and take a quick look around. If you still see shiny spots or sharp lines of paint, it means you haven't removed enough old paint. Turn on your sander and sand the area again to make sure your new coat of paint can adhere.
- It is important to ensure that the entire area has been shaved evenly. Automotive paints and primers are difficult to adhere to for a smooth, shiny surface.
Step 9: Wipe down your painting area with a clean, damp cloth to remove debris.

Once you've finished removing the old paint, wet a lint-free cloth and wipe the exterior of the car to remove dust from the sanding process. Then dry the surface with a clean microfiber cloth or chamois cloth.
- If you continue without cleaning your vehicle, you may get small particles trapped in the new paint.
Priming the Body for New Paint
Step 10: Cover up any parts of your car that you don't want to prime.

Cover areas around your painted surface with newspaper or plastic sheeting and use low strips of tape to secure the edges. The strategic tape will save you from dealing with damage from drift and overspray.
- For example, if you are painting one of the rear panels of a car, you must ensure that the rear wheel, trunk, and windows are all sealed.
- It may also be a good idea to move your car outside or park it on a cover to avoid contaminating your work area.
The point: If you are only painting a small part and have experience with cars, consider removing the part so you can prime and paint it yourself.
Step 11: Apply a base coat of automotive primer with a paint sprayer.

The sprayer will speed up the application process and help distribute the primer better. Hold the nozzle 6 to 8 inches (15 to 20 cm) from the vehicle surface and pull the trigger to begin releasing the primer. Slowly move the sprayer back and forth over the area you're painting, aiming for even coverage.
- Make sure your primer is properly diluted and mixed before you start spraying.
- A standard epoxy or acid primer will be the best choice for most projects. If you're going to paint over plastic, you'll need to use a plastic-specific primer instead.
- A thin base coat may be all you need if you're just repainting.
Step 12: Wait 20-60 minutes for the first coat of primer to dry.

Your first coat of paint must have enough time to dry completely before moving on to sanding and painting subsequent coats. Most automotive primers are formulated to dry in 30-45 minutes and will be ready for sanding in about an hour.
- Sanding the primer while it's wet will only strip the primer, ruining all your hard work.
- The exact drying time will vary depending on the product used and the application intensity of each coat.
Step 13: Sand the base coat to smooth out any inconsistencies with a sanding block.

If you notice any roughness or unevenness on the dry primer, sand them by hand with a fine sanding block of 1200 grit. Use smooth, swirling movements and light pressure to abrade the area until it matches the surrounding surface.
- If you cannot find any noticeable difference in texture, you can proceed with the next coat of primer immediately.
Step 14: Prime and sand 1-2 more times to ensure an even surface finish.

Make sure to let each of your subsequent coats dry for a full hour before sanding or starting the next coat. Once you've applied 2-3 even coats of paint and taken into account the recommended drying time, your car will be ready to paint!
Buy Fastplus Factory-Direct Abrasives
Want to purchase high-quality, factory-direct sanding discs, sanding sheet rolls, and film abrasive discs for automotive applications? Try Fastplus Abrasives today and place your orders online! 


