
Sanding Marks No More: Easy Tips to Prevent Them on Car Paint
Sanding with sandpaper is an essential part of the car painting process, but it can also be a major cause of sanding marks. These marks can be unsightly and difficult to remove, so it's important to take steps to prevent them. In this blog post, we'll discuss some simple tips for preventing sanding marks on car paint.
What Are Sanding Marks?

Sanding marks are scratches or grooves that are created when sanding a surface. They can be caused by using too coarse sandpaper, not sanding in the right direction, or not sanding evenly. Sanding marks can be unsightly and difficult to remove, so it's important to take steps to prevent them.
Here are some of the most common types of sanding marks:
- Swirl marks: These are the most common type of sanding mark. They are caused by sanding in a circular motion.
- Orange peel: This is a rough, pebbly texture that can be caused by using too coarse sandpaper or not sanding evenly.
- Chatter marks: These are small, V-shaped marks that are caused by the sandpaper jumping or vibrating.
- Ghosting: This is a thin, translucent layer of paint that is left behind after sanding.
Common Causes of Sanding Marks
The Paint Was Sanded with Too Coarse Sandpaper:

One of the primary culprits behind the formation of sanding marks is using sandpaper with a grit that is too coarse for the stage of the paintwork. Coarse sandpaper can cut deep into the paint, leaving behind visible scratches. It's essential to start with a finer grit and gradually progress to coarser grits as needed to ensure a smoother surface.
Insufficient Drying Times for the Undercoat Material:
Proper drying times between coats of undercoat materials are crucial to allow the solvents to evaporate and the paint to cure. Failing to adhere to these drying times can lead to sanding marks because the paint may not have reached the necessary hardness before sanding, making it susceptible to scratches.
Too Thin Filler and Topcoat Layer Were Applied:
When applying filler and topcoat layers, it's essential to ensure adequate coverage to conceal any sanding marks or imperfections in the lower layers. Applying these layers too thinly can result in the sanding marks showing through, marring the final finish.
Improper Sanding Techniques or Sanding Machines were Used:
The technique and equipment used during the sanding process play a significant role in the occurrence of sanding marks. Incorrect sanding techniques, such as uneven pressure or excessive heat generation, can lead to marks. Additionally, using the wrong type of sanding machine or sandpaper can exacerbate the problem. It's vital to use appropriate tools and follow best practices to avoid creating marks during sanding.
Inadequate Surface Preparation:
Poor surface preparation, such as not properly cleaning the car's surface before sanding or not removing contaminants, can result in sanding marks. Any foreign particles or debris left on the surface can be abrasive and cause scratches during sanding.
Insufficient Lubrication or Wet Sanding:
Dry sanding without proper lubrication can generate excessive friction and heat, increasing the chances of sanding marks. Wet sanding or using an automotive sanding lubricant is essential to reduce friction and keep the sandpaper from clogging.
Rushing the Sanding Process:
Rushing through the sanding process without taking the time to inspect and correct imperfections can lead to sanding marks. Patience is crucial to achieving a flawless finish.
Tips to Prevent Sanding Marks
Achieving a pristine finish on your car's paint job requires a systematic approach to sanding that minimizes the risk of unsightly marks. Here's a detailed breakdown of the essential steps to prevent sanding marks:
Use the Specified Grit of Sandpaper:

Choosing the right grit sandpaper is the foundation of preventing sanding marks. The grit you select should align with the specific stage of your paintwork. For body filler, start with coarser grits like P80 or P120 to efficiently shape and smooth the filler. When working on primer filler or additional layers, transition to finer grits such as P240 for a more delicate touch.
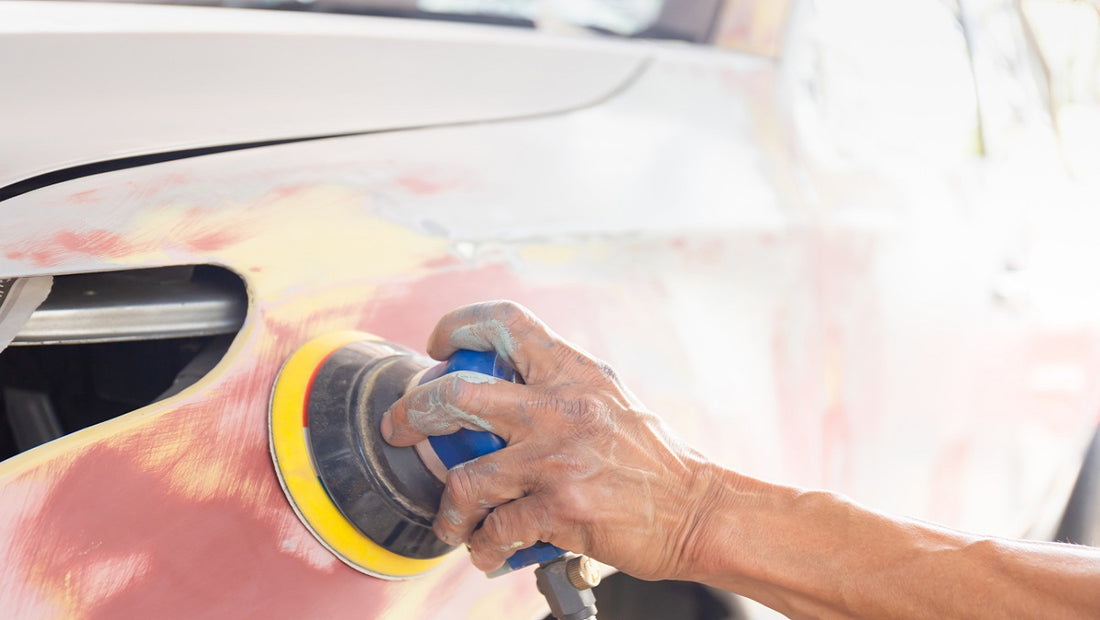
Using a Sanding Block or Soft Sanding Pad:
Employing a sanding block or a soft sanding pad is pivotal in maintaining an even, consistent pressure during the sanding process. These tools provide stability and help distribute pressure uniformly across the surface, effectively preventing uneven sanding marks. By using them, you create a flatter surface that's less prone to imperfections.
Keeping Sandpaper Clean:
Regularly cleaning the sandpaper is a crucial practice. Dust, paint debris, or contaminants that accumulate on the sandpaper can become abrasive and cause scratching. In addition, by using multi-hole sanding discs for excellent dust extraction, you can ensure that the sandpaper remains effective and minimizes the risk of leaving marks.
Keep to Recommended Drying Times:
Following recommended drying times between coats of undercoat materials, like primer and filler, is vital. These drying times allow the paint to cure properly, ensuring that it reaches the necessary hardness before sanding. Rushing through this stage can result in sanding marks because the paint may still be soft and susceptible to scratches.
Place the Sanding Machine on the Surface of the Paintwork Before Starting the Machine:
Before engaging a sanding machine, ensure that it is in contact with the surface of the paintwork. Starting the machine while it's hovering above the surface can result in uneven sanding and potential marks. By placing the machine on the paintwork first, you establish proper contact and a consistent sanding pattern.
When Dry Sanding Filler Coats, the Eccentric Stroke Should Not Be Greater Than 5 mm:
When dry sanding filler coats, be mindful of the eccentric stroke of the sanding machine. It should not exceed 5 mm to prevent excessive friction and heat buildup, which can cause sanding marks. Proper control of the machine's stroke ensures a more precise and mark-free sanding process.
Conclusion
Sanding marks are a common problem that can ruin the appearance of a car's paint job. However, by following the tips in this blog post, you can minimize the risk of sanding marks and achieve a flawless finish.
Buy Factory-Direct Fastplus Abrasives
Want to purchase high-quality, factory-direct sanding discs, sanding sheet rolls, and film abrasive discs for automotive applications? Try Fastplus Abrasives today and place your orders online!


