
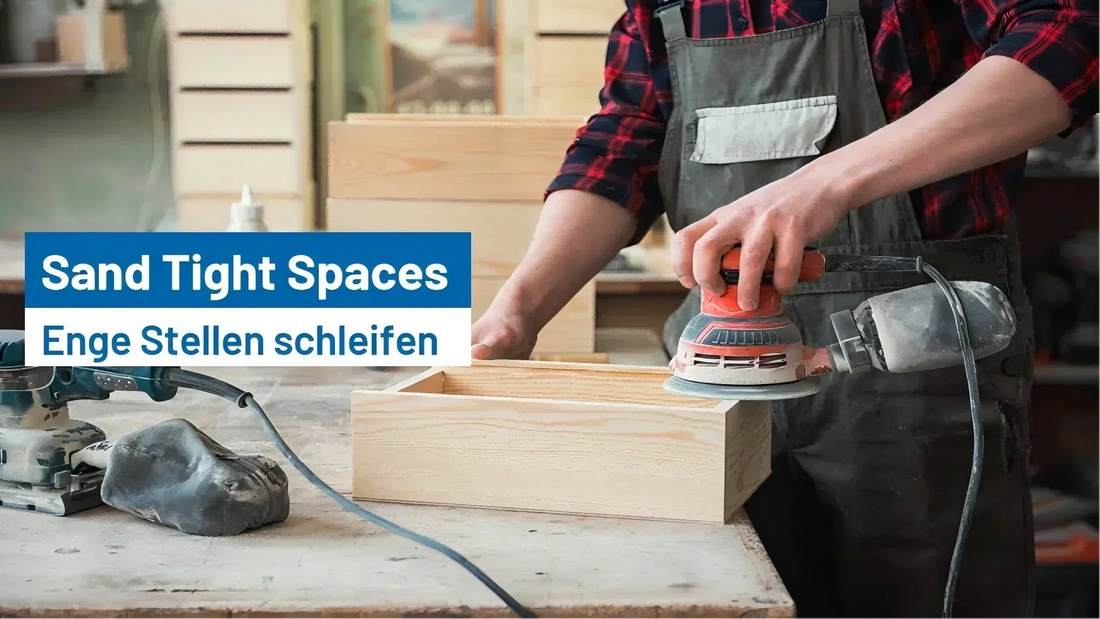
How to Sand Tight Spaces with an Orbital Sander?
If you’ve ever worked on a furniture restoration project, refinished a cabinet, or built anything with tight corners and hard-to-reach areas, you know how frustrating it can be to get those spaces smooth and clean. Many DIYers and professionals assume that orbital sanders are only good for large, flat surfaces—but the truth is, with the right strategy, you can use them effectively in tight spaces.
In this blog post, we’ll break down how to sand tight areas with an orbital sander, what tools and accessories you’ll need, and some pro-level tips to help you get flawless results.

🔧 Why Use an Orbital Sander for Tight Spaces?
Orbital sanders—especially compact or random orbital types—offer a smooth finish with minimal swirl marks. They’re faster and more consistent than hand sanding, and when paired with the right pads and sandpaper, they can get into surprisingly tricky areas.
That said, tight spaces require finesse. Using the edge of the sander, a detail pad, or switching to mesh sanding discs can make all the difference.
🧰 Tools & Materials You’ll Need
Before diving into the process, make sure you’re equipped with:
✅ A compact orbital sander (3"–5" pad is ideal)
✅ Hook-and-loop sanding discs in various grits (80 to 320)
✅ Detail sanding attachment (finger or triangular shape)
✅ Mesh sanding discs – ceramic or aluminum oxide
✅ Foam sanding blocks or sanding sponges
✅ Dust mask, safety goggles, and hearing protection
Want to sand efficiently without clogging? Try our CeraMesh Net Sanding Discs – perfect for both flat and curved surfaces.
🛠 Step-by-Step: How to Sand Tight Spaces with an Orbital Sander
1. Inspect the Area First
Tight corners, inlays, between slats… every area is different. Look closely and ask:
- Can the pad reach the space directly?
- Will I need to use the edge or a detail accessory?
- Should I sand by hand in certain spots?
Understanding your surface helps you decide the best starting point.
2. Pick the Right Grit
Start with coarse grit (80-100) for removing paint or rough wood. Switch to medium grit (120-180) for shaping and smoothing, then finish with fine grit (220-320) before staining or painting.
💡 Pro tip: Use mesh sanding discs for smoother work on curves or recessed areas—they flex better and last longer.
3. Attach the Sanding Disc
Choose a hook-and-loop backing for quick disc changes. If you’re working in narrow corners or edges, consider using:
- A triangular sanding head
- A finger sanding pad
- A smaller disc size (3" over 5")
These make maneuvering much easier.

4. Start Sanding – Gently
Place the sander on the surface before turning it on. Use:
- Light pressure to avoid gouges
- Short, controlled motions
- The edge of the disc for tighter spaces
⚠️ Don’t tilt the sander or force it into corners. Let the machine work for you.
5. Finish by Hand (if Needed)
Some tight spots will always require a little elbow grease. Switch to:
- A sanding sponge
- A folded piece of sandpaper
- A foam pad
This is especially true in carved details, inside corners, and narrow slats.
💡 Common Problem Areas & How to Handle Them
🔹 Inside Corners:
Use the edge of the pad at an angle. A triangle detail attachment works wonders here.
🔹 Between Chair Slats or Railings:
Use a finger-style sander or switch to hand sanding with a sponge or thin sanding stick.
🔹 Curves or Decorative Moldings:
Try a soft foam interface pad with a mesh disc for a flexible approach that contours to curves.
🔹 Intricate Carvings:
Hand sanding only. Don’t risk damaging fine details with a power tool.
❌ Mistakes to Avoid
- Using too much pressure → causes swirl marks or gouges
- Starting with a grit that’s too fine → wastes time
- Skipping dust control → clogs the disc and reduces visibility
- Ignoring hand sanding → leads to inconsistent results
🧼 Dust Control Is Key
Tight spaces mean more trapped dust. Here’s how to manage it:
- Use a dust extractor or attach a vacuum hose
- Choose mesh discs to reduce clogging
- Wipe the area down frequently with a tack cloth

Dust not only reduces sanding performance but can ruin your final finish if left behind.
🔄 Grit Progression Matters
A smooth finish is all about working through grits step by step:
| Step | Grit | Purpose |
|---|---|---|
| 1 | 80–100 | Initial smoothing or paint removal |
| 2 | 120–150 | Mid-level shaping |
| 3 | 180–220 | Pre-finish smoothing |
| 4 | 320+ | Final finish before stain/paint |
Skipping steps can leave scratches that will show through paint or stain.
Skipping steps can leave scratches that will show through paint or stain.
🏁 Final Thoughts
Sanding tight spaces may take more time and care, but using an orbital sander the right way can save effort and deliver professional results. Just remember:
- Go slow
- Use the right grit
- Don't force the tool
- Combine machine and hand sanding
And most importantly—let the sander do the work!


