
How to Sharpen Dulled Scissors Using Sandpaper?
While professional sharpening services offer a comprehensive solution to dull scissors, they often come with a price tag and may not always be readily available. This is where the DIY method of sharpening scissors using sandpaper steps in. Although it's essential to recognize that sandpaper sharpening has its limitations and is best suited for mildly dulled scissors, it offers a practical alternative for maintaining the sharpness of your tools between professional sharpening sessions.
Through this guide, Fastplus Abrasives will provide the step-by-step process of revitalizing your dulled scissors, empowering you with the knowledge and skills to maintain your tools' performance and prolong their lifespan.
Preparing for Sharpening

First and foremost, gather the materials required for the sharpening process. You'll need a sandpaper sheet or sanding disc, preferably in the range of 150 to 200 grit. This range strikes a balance between abrasiveness and smoothness, making it ideal for sharpening scissors effectively. Additionally, consider using safety gloves for added protection, although they are optional.
Now, set up your workspace. Make sure you have a flat, sturdy surface like a solid workbench or table. Having a stable surface is important for keeping control and precision while sharpening. Also, make sure your workspace is well-lit for good visibility. Proper lighting helps you inspect the scissors' blades and ensures even sharpening.
By gathering the necessary materials and preparing your workspace thoughtfully, you set yourself up for a successful sharpening session. Taking the time to prepare ensures you can focus on the task at hand and achieve optimal results in restoring the sharpness of your scissors.
Sharpening Process
Now that you have everything you need and your workspace is ready, let's get started with sharpening. Follow these simple steps to sharpen your blunt scissors using sandpaper.
Step-by-Step Guide
1. Holding the Sandpaper Securely:

Start by making sure the sandpaper is tight on a flat surface or holding it firmly in your hand. A steady base helps keep the sandpaper in place and stops it from sliding around while you sharpen.
2. Technique for Sharpening:
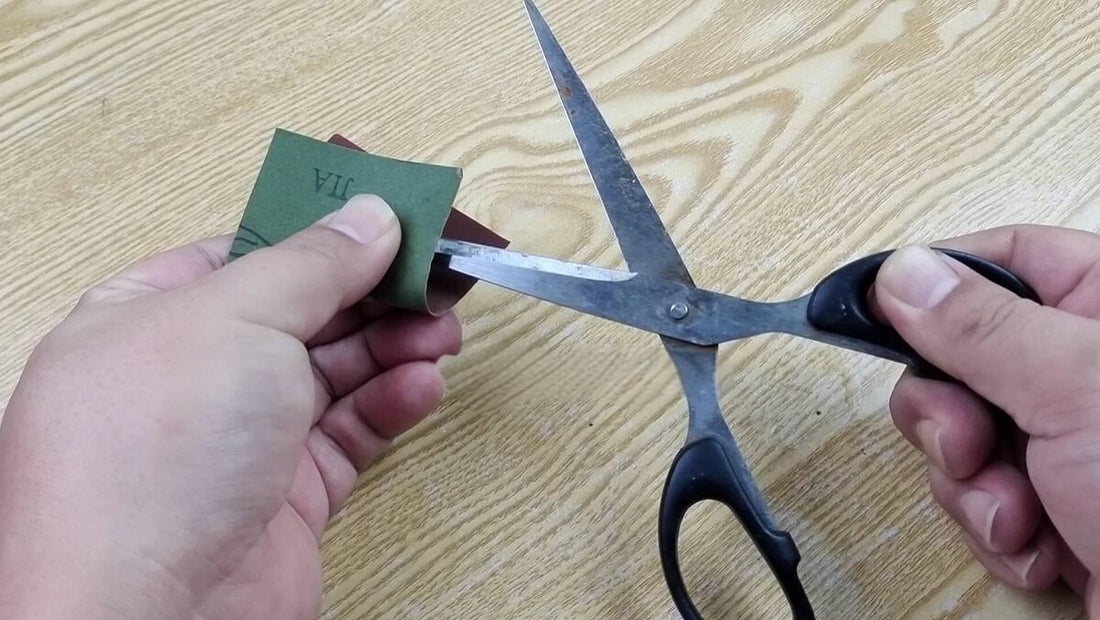
- Place the scissors at a slight angle on the folded sandpaper, making sure both blades touch the rough surface.
- Keep the angle consistent as you sharpen, usually between 20 to 30 degrees compared to the sandpaper. This angle helps sharpen effectively without straining the scissors too much.
- Use a smooth, steady motion to sharpen the scissors, gliding the blades along the sandpaper in full strokes. Avoid pushing too hard or making sudden movements, as it might cause uneven sharpening or harm the scissors.
- When sharpening the scissors, use steady, moderate pressure to achieve consistent abrasion on the blade surface. Avoid pressing too firmly, as this can wear out or harm the blades prematurely.
- Keep a steady rhythm and pressure as you sharpen, and pay attention to how the scissors cut to assess the success of your technique.
- For balanced sharpening and to prevent uneven blade wear, alternate between sharpening each side of the scissors. After sharpening one blade for a set number of strokes, switch to the other blade and repeat.
- By regularly alternating sides, you ensure both blades get equal attention and abrasion, leading to a sharp, balanced edge that improves cutting accuracy and performance.
Sharpening Variations:
Scissor Types: Depending on the type of scissors being sharpened, adjustments may be necessary. For example, when sharpening hair shears, consider making angled cuts to accommodate the scissor's design and cutting motion.
Alternative Techniques: In addition to folding the sandpaper, alternative techniques can be utilized. For instance, securing the sandpaper to a flat surface, such as a table, and cutting against it can provide a different approach to achieving sharpening results.
Testing and Refining
After completing the sharpening process, it's essential to test the sharpness of your scissors and make any necessary refinements to ensure optimal performance.
Testing Sharpness:
- Cutting Paper: A straightforward way to check sharpness is by cutting paper. Sharp scissors should smoothly slice through the paper with clean, precise cuts. Watch out for any resistance or tearing, as these could mean areas need more sharpening.
- Fabric Cutting: Another good method is cutting fabric scraps. Sharp scissors will glide through fabric without snagging or bunching. Look at the fabric edges for fraying or uneven cuts, which may signal areas that need improvement.
Refining the Sharpening:
- Additional Cuts: Based on the testing results, if you find that certain areas of the scissors are still dull or not performing as desired, consider making additional cuts on those specific spots. Focus on the problem areas while maintaining alignment and consistency with your cutting technique.
- Adjusting Pressure: If the scissors are sharp but require a bit more refinement, you can adjust the pressure applied during cutting. Lighten the pressure slightly to achieve a smoother, more polished edge without risking over-sharpening.
Avoiding Over-Sharpening:
- Caution Against Excessive Cuts: Although it may seem tempting to keep sharpening until the scissors feel extremely sharp, it's important to be careful and avoid overdoing it. Sharpening excessively can cause misalignment or even harm the blades.
- Regular Testing: To prevent over-sharpening, regularly test the sharpness of the scissors during the sharpening process. Keep checking how well they cut and adjust as necessary to maintain sharpness without risking damage to the scissors.
Troubleshooting
Encountering issues during the sharpening process is not uncommon, but understanding the causes and implementing effective solutions can help overcome challenges and achieve optimal results.
Difficulty Cutting:
Difficulty cutting after sharpening may indicate that the scissors have not been sharpened sufficiently or that the wrong sandpaper grit was used during the sharpening process. Insufficient sharpening may leave the blades dull, preventing them from effectively cutting through materials. Additionally, using the wrong sandpaper grit, such as one that is too fine, may not provide enough abrasion to restore sharpness.
To address difficulty cutting, consider additional sharpening with the appropriate grit sandpaper. If the scissors still feel dull or struggle to cut after sharpening, opt for a coarser grit sandpaper to provide more aggressive abrasion and restore sharpness effectively. By ensuring thorough sharpening with the appropriate grit, you can improve cutting performance and usability.
Uneven Cutting:
If you notice uneven cutting after sharpening your scissors, several factors may be contributing to the issue. Improper sharpening technique, such as inconsistent pressure or angle, can result in uneven abrasion on the blades. Additionally, misaligned blades can cause one side of the scissors to cut more effectively than the other.
To address uneven cutting, focus on re-sharpening the scissors with an emphasis on even strokes and consistent pressure. Ensure that both blades receive equal attention during sharpening to achieve uniform sharpness. Additionally, check the alignment of the scissor blades and make any necessary adjustments to ensure they are properly aligned for even cutting.
Scissor Noise:
If you hear unusual noise, such as grinding or scraping, when using your scissors after sharpening, it may be due to friction caused by misaligned blades. Misaligned blades can rub against each other during cutting, resulting in increased friction and noise.
To remedy scissor noise, focus on re-sharpening the scissors while paying close attention to maintaining alignment. Ensure that the blades are properly aligned throughout the sharpening process to prevent friction and minimize noise during cutting. By sharpening with a focus on maintaining alignment, you can restore smooth cutting action and reduce unwanted noise.


