
Easy Steps to Strip Paint from Metal with Sandpaper
Removing paint from metal can seem like a daunting task, but with the right tools and technique, it becomes a manageable project. Among the various methods available, using sandpaper is one of the most effective and cost-efficient options. Whether you're working on a DIY project or restoring old furniture, learning how to strip paint from metal with sandpaper will save you time and effort while achieving a smooth, clean finish.
In this guide, we'll walk you through the easy steps to remove paint from metal using sandpaper, ensuring that your metal surfaces are prepared for repainting or restoration. Let’s dive in!

Why Sandpaper?
Before we get into the process, let’s first understand why sandpaper is such a useful tool for stripping paint from metal. Unlike chemical paint removers, sandpaper provides a more controlled way to remove layers of paint. It also works well for different types of metals, from steel to aluminum, without damaging the underlying material.
Sandpaper is available in various grits, allowing you to tailor your approach depending on the condition of the paint and the metal surface. Coarser grits are ideal for heavy paint buildup, while finer grits are useful for smoothing the surface after the paint has been removed. If you’re looking for high-quality sandpaper, options like Film Sanding Disc PuroFilm 150mm Ceramic Velcro 15 Holes and PURO Sanding Discs 150mm 119 Holes are perfect for tackling tough paint layers with precision.
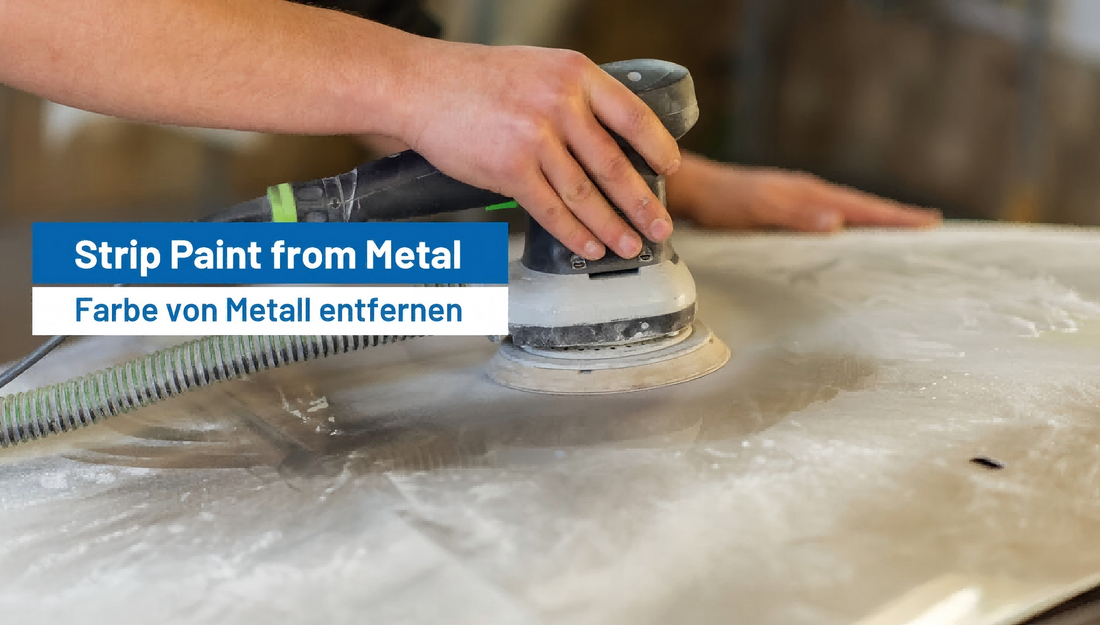
Materials You’ll Need
Before you get started, make sure you have the following materials on hand:
![]()
- Sandpaper – You’ll need a range of sandpaper grits, from coarse to fine. Typically, you’ll start with 60-80 grit for removing the paint, then move to finer grits like 120 and 220 for a smooth finish. Sanding Sheet Roll PURO 70mmx12m Ceramic Velcro Multi-hole is a great option for larger areas, offering versatility and consistent sanding performance. This product features durable ceramic minerals, hook-and-loop backing for easy changeover, chevron multi-holes for dust extraction, and is anti-clogging for long-lasting sanding.
- Sanding Block or Power Sander – While you can sand by hand, using a sanding block or power sander can speed up the process and provide a more consistent finish.
- Protective Gear – Safety glasses, dust mask, and gloves are important for your safety.
- Paint Remover (optional) – If the paint is particularly stubborn, a paint remover or stripper can be used in conjunction with sandpaper to loosen the paint.
- Clean Rags – For wiping off dust and paint debris.
- Metal Cleaner – After paint removal, use a cleaner to prep the surface for repainting.
Step-by-Step Guide: How to Strip Paint from Metal Using Sandpaper
Step 1: Prepare the Area
Before you begin sanding, it’s important to prepare your workspace. Choose a well-ventilated area, preferably outdoors, or in a space with good airflow. Sanding metal produces a lot of dust, which can be harmful if inhaled.
Lay down a drop cloth or newspaper to catch any falling paint chips and dust. Make sure the metal piece you are working on is stable and secure. If it’s a small item, you can use a vice or clamp to hold it in place. For larger pieces, work with a stable surface or workbench.
Step 2: Choose the Right Sandpaper
The key to effective paint removal is choosing the right sandpaper grit. Start with a coarse grit to tackle the thick layers of paint, then gradually work your way up to finer grits to smooth out the surface.
- 60-80 Grit: This coarse grit is great for initial paint removal, especially if the paint is thick or old. It helps to break through the paint quickly.
- 100-120 Grit: Once you’ve removed most of the paint, switch to this grit to remove any remaining paint and smooth the surface.
- 150-220 Grit: This finer grit is used for the final pass to ensure a smooth and even metal surface ready for repainting.
If you’re using a power sander, start with the coarser grit and change to finer grits as you move through the process. Film Sanding Disc PuroFilm 150mm Ceramic Velcro 15 Holes is a great option for these phases, as its ceramic construction and velcro backing ensure a strong hold and efficient sanding.
Step 3: Start Sanding with Coarse Grit
Now that you're prepared, it's time to begin sanding the metal. Start with the coarse grit sandpaper (60-80 grit) to remove the bulk of the paint. If you’re working by hand, wrap the sandpaper around a sanding block for better control and even pressure.
For power sanders, attach the coarse grit sandpaper and move the sander slowly across the surface. Always sand in the direction of the grain (if there is one), and don’t apply excessive pressure. Let the sandpaper do the work. Move the sander in small, controlled circles or straight lines to cover the entire area.
Check your progress frequently. You should begin to see the paint coming off in layers. If the paint is particularly stubborn, try using a paint remover or stripper before resuming sanding.
Step 4: Switch to Medium Grit
Once you’ve removed most of the paint with the coarse grit, switch to a medium grit sandpaper (100-120 grit). This step helps smooth out any rough edges or uneven patches left by the coarser sandpaper. Use the sanding block or power sander to gently sand the surface, removing any remaining paint spots.
At this stage, it’s important to work in smaller sections to ensure you don’t miss any areas. Take your time and continue to monitor your progress. The metal surface should begin to take shape and show less paint residue.
Step 5: Smooth the Surface with Fine Grit
After you’ve removed all the paint, switch to the fine grit sandpaper (150-220 grit). This step is essential for giving the metal a smooth and even finish, especially if you plan to repaint the surface. The finer grit helps eliminate any visible sanding marks left from the coarser grits, leaving the metal ready for a new coat of paint or a clean, polished look.
Take care to sand the entire surface evenly, focusing on any spots that might still have residual paint. Remember, the goal is to create a smooth, smooth surface, free from imperfections.
Step 6: Clean the Surface
Once you’ve finished sanding, it’s time to clean the metal. Use a clean rag to wipe away all the dust and debris from sanding. You can also use a metal cleaner or degreaser to remove any oils or residues left behind during the sanding process.
It’s crucial to thoroughly clean the surface before applying a new coat of paint. Any leftover dust can interfere with the paint’s adherence and affect the final finish.
Step 7: Inspect and Prep for Painting
Now that the paint has been completely stripped, inspect the surface carefully. Ensure that no paint residue is left, and that the metal is smooth and ready for priming and painting. If you notice any deep scratches or imperfections, you can lightly sand those areas with a finer grit.
Once you’re satisfied with the finish, apply a coat of primer to prepare the metal for painting. Allow the primer to dry completely before applying your chosen paint.
Tips for Stripping Paint from Metal
- Use a consistent pressure: Whether sanding by hand or with a power sander, apply consistent pressure to avoid gouging the metal.
- Work in sections: Breaking the task into smaller sections ensures you don’t miss any areas and can achieve a more even finish.
- Take breaks: Sanding can be physically demanding, especially when working on large surfaces. Take regular breaks to avoid fatigue and ensure the best results.
- Wear protective gear: Always wear a dust mask, safety goggles, and gloves to protect yourself from dust and debris.
Conclusion
Stripping paint from metal with sandpaper is a straightforward and effective method for restoring metal surfaces. By following these easy steps, you can remove old paint, leaving behind a clean and smooth metal surface that’s ready for its next project. From furniture restoration to automotive work, sanding is a versatile and reliable technique to get the job done right.
With the proper sanding materials and a little patience, you can strip paint from metal like a pro. Options such as Sanding Sheet Roll PURO 70mmx12m Ceramic Velcro Multi-hole and PURO Sanding Discs 150mm 119 Holes provide the durability and performance needed to tackle even the toughest paint jobs. Choose FastPlus for high-quality sanding tools that ensure a professional finish on all your projects.


