
Ask-A-Pro: How to Know If Wet Sanding Is Required
Wet sanding is a finishing technique often used in automotive, woodworking, and industrial projects to achieve a flawlessly smooth surface. For professionals, the question isn’t just how to wet sand, but when it’s necessary. Knowing when to apply this technique can make the difference between an average result and a professional-grade finish. In this “Ask-A-Pro” guide, we’ll break down the role of wet sanding, situations where it’s essential, the materials involved, and pro tips to ensure success.
What is Wet Sanding?
Wet sanding is a surface-smoothing process that uses water—or sometimes a mixture of water and soap—as a lubricant while sanding with fine-grit abrasive paper. The lubricant minimizes friction, reduces heat, flushes away debris, and prevents clogging of the sandpaper. The result is an ultra-smooth finish that’s often superior to dry sanding alone.
The technique is most commonly associated with automotive refinishing (smoothing paint or clear coat), but it also applies in woodworking, metal finishing, and even household DIY projects. The controlled abrasion removes imperfections such as scratches, orange peel texture, dust nibs, and uneven coatings.

Why Do Professionals Wet Sand?
Professionals reach for wet sanding when they need precision and a surface that is visually perfect under scrutiny. Here are the main reasons:
-
To Level Imperfections
Fresh paint, clear coat, or lacquer often has surface irregularities. Wet sanding can level these, creating a flat surface ready for polishing. -
To Minimize Heat and Dust
The lubricant keeps the workpiece cooler and reduces airborne dust. This not only extends the life of the abrasive but also makes the process safer and cleaner. -
To Achieve a Mirror Finish
Polishing compounds can only do so much. Wet sanding creates the ultra-smooth foundation required for a deep gloss finish. -
To Correct Small Flaws
Drips, runs, or trapped debris in coatings are common during spraying. Wet sanding helps correct them without stripping the entire surface.
When is Wet Sanding Necessary?
Let’s break down the most common scenarios where wet sanding moves from optional to essential.
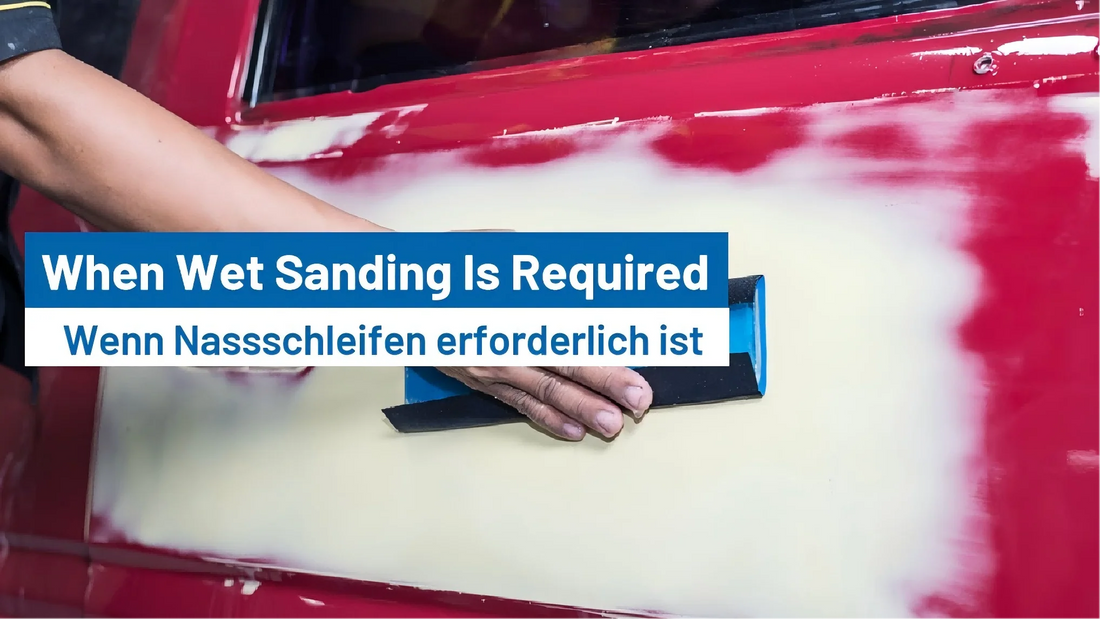
1. After Applying Clear Coat or Paint
When you spray automotive paint or clear coat, the surface often develops an uneven texture known as orange peel. This textured look scatters light and prevents the high-gloss reflection you want. Wet sanding is necessary to level the surface before polishing.
Signs you need wet sanding:
- The paint feels bumpy or textured.
- Dust particles are visible under the clear coat.
- Small runs or sags appear in the finish.
2. During Automotive Paint Correction
Detailers often wet sand when paint correction by polishing alone isn’t enough. Severe scratches, oxidation, or etching that has penetrated the clear coat require light sanding before buffing.
Examples:
- Deep scratches that catch your fingernail.
- Acid rain etching or bird dropping damage.
- Oxidized paint with chalky texture.
3. Refinishing Headlights
Plastic headlight lenses become cloudy over time due to UV degradation. Wet sanding removes the oxidized layer, allowing polishing and sealing for restored clarity.
4. Repairing Wood Finishes
In woodworking, wet sanding is necessary between coats of finish (varnish, shellac, polyurethane) to remove dust nibs and ensure smooth layering. The lubricant prevents burning through delicate finishes.
Use cases:
- Final leveling before applying the last coat of varnish.
- Creating a satin feel on tabletops or cabinets.
5. Metal and Industrial Applications
For metals like aluminum or stainless steel, wet sanding prepares the surface for buffing and polishing. In industrial settings, it’s used to achieve a flawless surface prior to plating, coating, or painting.
When is Wet Sanding Not Necessary?
Understanding when to avoid wet sanding is just as important. It may not be required if:

- Minor imperfections can be corrected with polishing compounds alone.
- Soft materials (like raw pine or soft plastics) may be damaged by the moisture or too aggressive abrasion.
- Single-stage paint jobs with no clear coat may risk thinning the color too quickly.
- Heavily damaged surfaces may need repainting rather than sanding.
Choosing the Right Abrasives for Wet Sanding
Not all sandpaper is designed for wet sanding. Specialized waterproof sandpaper or abrasive discs are essential. Common materials include:
- Silicon Carbide – Preferred for wet sanding due to its sharpness and durability.
- Aluminium Oxide – Often used in woodworking.
- Ceramic Abrasives – High-performance option for demanding applications.
Typical grit ranges for wet sanding:
- 800–1000 grit: Removing orange peel, runs, or heavy defects.
- 1200–1500 grit: Refining scratches from previous sanding.
- 2000–3000 grit: Final smoothing before polishing.
- 5000 grit (ultra-fine films): Pre-polish finishing.
Pro Tips: How to Wet Sand Properly
1. Prepare the Surface
Clean thoroughly to remove dirt, grease, or wax. Contaminants can scratch the surface during sanding.
2. Use Proper Lubrication
A mix of clean water and a drop of dish soap reduces friction. Keep the surface flooded to prevent scratches.
3. Sand Lightly and Evenly
Use minimal pressure, keeping the sandpaper flat. Work in straight lines, alternating direction with each grit stage for consistent results.
4. Inspect Frequently
Wipe the surface often to check progress. Stop as soon as imperfections are leveled to avoid thinning clear coat or finishes.
5. Follow with Polishing
Wet sanding leaves a hazy matte surface. Always finish with compound polishing and then fine polishing to restore full gloss.

Mistakes to Avoid in Wet Sanding
- Skipping Grits – Jumping from coarse to very fine grits leaves visible scratches.
- Using Too Much Pressure – Can cut through clear coat or finish quickly.
- Not Keeping the Surface Wet – Dry spots can cause deep scratches.
- Neglecting Edge Areas – Clear coat is thinner near edges; sand lightly there.
- Not Sealing After Headlight Restoration – Without UV protection, headlights will cloud again.
Safety Considerations
Wet sanding may feel safer than dry sanding because there’s less dust, but precautions are still necessary:
- Wear gloves to protect skin from prolonged water/abrasive contact.
- Use eye protection to avoid slurry splashes.
- Work in a ventilated area when sanding painted surfaces with solvents or chemicals present.
- Dispose of slurry responsibly since it contains fine particles that shouldn’t enter drains.
Alternatives to Wet Sanding
Sometimes, wet sanding isn’t the best option. Alternatives include:
- Machine Compounding – Using a rotary or dual-action polisher with aggressive compounds to level clear coat.
- Dry Sanding with Dust Extraction – Modern abrasive systems (like mesh sanding discs) minimize clogging and dust without water.
- Chemical Levelers – Certain surface leveling solutions exist for coatings, though less common.
These methods may save time or suit specific materials better.
Conclusion
So, when is wet sanding necessary? The answer depends on the level of finish you require and the type of imperfections present. For automotive professionals, it’s indispensable after painting or clear coating to eliminate orange peel and achieve a mirror-like gloss. For woodworkers, it’s key between coats of finish. For detailers and DIYers, it’s often the only way to restore scratched paint or cloudy headlights.
While wet sanding takes more time and care than polishing alone, the results speak for themselves. When used correctly, it transforms good surfaces into flawless ones, making it a powerful tool in every professional’s arsenal.


